Here is a link to my Cylon build pictures. I recommend the double sided foam tape. You can just leave one side of the tape with the cover on it for sealing up the mohawk seem. It ends up pretty sturdy. I used a belt sander to get the edges of the mohawk to line up pretty well. Then I used a dremel with a sander around the mouth, eyes, and neck area. When your using the Dremel, do it from the inside of the helmet, so that if you slip you will probably only scrape the inside of the helmet. I slipped a bit around the mouth area, you can see it in some of the closeups, but nobody ever notices little details like that, it's all "Holy crap! A Cylon!".
http://jong.smugmug.com/gallery/5714049 ... 1782_Mc55n
Building my Cylon-Knight
-
Cylon-Knight

- Site Administrator
- Posts: 6432
- Joined: Wed Jul 23, 2008 9:32 pm
- Location: Kansas City
- Contact:
But if you do that, how do you put in the eye and mouth grill? Mount them to one side and then it just "floats" on the other side?
Second topic: GoldCylon, any luck on posting an under suit pattern? I could start my planning for that if I had more info. Thanks for any help!!!
Second topic: GoldCylon, any luck on posting an under suit pattern? I could start my planning for that if I had more info. Thanks for any help!!!
"All Baseships are now in range to attack the Colonies."

-
GoldCylon

- Founder
- Posts: 6948
- Joined: Fri Dec 02, 2005 3:02 pm
- Location: Sacramento
- Contact:
Is this a Krop helmet?
Also I have no plans on posting the pattern online. The file is so massive in size that it can't be printed out unless on a CAD printer. That print out would be a cost maybe $100 dollars. That is a large cost to pass on to making your under suit. Maybe, just maybe section scans will work, but currently I have no idea where the patterns are at. This will be something that will take a while to post.
Also I have no plans on posting the pattern online. The file is so massive in size that it can't be printed out unless on a CAD printer. That print out would be a cost maybe $100 dollars. That is a large cost to pass on to making your under suit. Maybe, just maybe section scans will work, but currently I have no idea where the patterns are at. This will be something that will take a while to post.
-
CinnamonToast
- Centurion
- Posts: 27
- Joined: Sat Aug 23, 2008 8:59 am
- Location: Atlanta
Well, around the mouth piece you use both sides of the tape. It's just down the inside of the seam that you don't remove the backing.Cylon-Knight wrote:But if you do that, how do you put in the eye and mouth grill? Mount them to one side and then it just "floats" on the other side?
Second topic: GoldCylon, any luck on posting an under suit pattern? I could start my planning for that if I had more info. Thanks for any help!!!
On my light, I wrapped the back and top of it in black electrical tape to cut down on the glare in your eyes as you wear it. The LED is the only part that I did use glue on. There is this glue called Goop that works pretty well there.
-
Cylon-Knight
- Site Administrator
- Posts: 6432
- Joined: Wed Jul 23, 2008 9:32 pm
- Location: Kansas City
- Contact:
Well, my own first attempt at a true vented mouth grill - was a flop (photos to come tomorrow - I am TIRED now). I used slats from an old set of vinyl mini-blinds. I cut and taped together an arrangement that mimics the grill; however the blinds do not lend themselves to bending at all (the grill has that slight curve to it).
A completely flat grill looks just totally WRONG
A completely flat grill looks just totally WRONG
"All Baseships are now in range to attack the Colonies."
-
Cylon-Knight
- Site Administrator
- Posts: 6432
- Joined: Wed Jul 23, 2008 9:32 pm
- Location: Kansas City
- Contact:
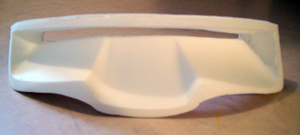
Here we go, the Mark I Grill (the flop) photos I mentioned above.
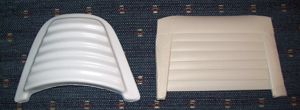
Grill from my kit, next to mine
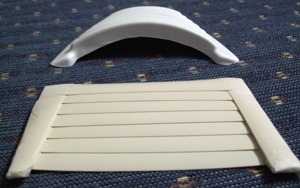
You can see the curve it should have, and the curve it DOES NOT!
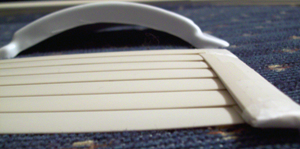
My grill all together has lost its "vents" (they are there but all pushed together the air-flow wouldn't happen).
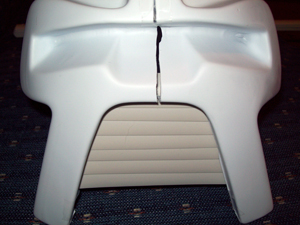

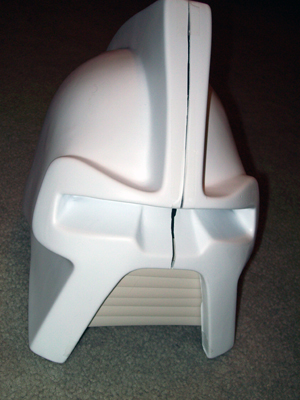
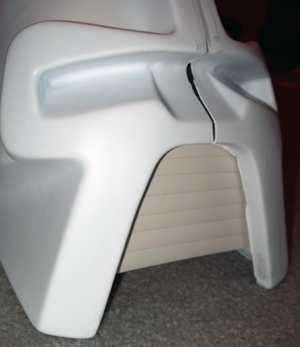
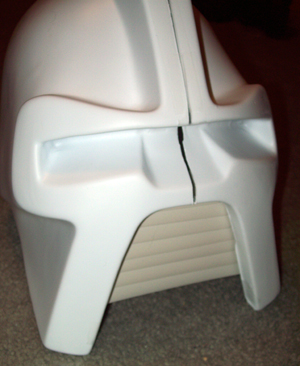
Mark I grill in the helmet - a few views. Not all THAT bad... but not 'right.'
Grill from my kit, next to mine
You can see the curve it should have, and the curve it DOES NOT!
My grill all together has lost its "vents" (they are there but all pushed together the air-flow wouldn't happen).
Mark I grill in the helmet - a few views. Not all THAT bad... but not 'right.'
"All Baseships are now in range to attack the Colonies."
-
Cylon-Knight
- Site Administrator
- Posts: 6432
- Joined: Wed Jul 23, 2008 9:32 pm
- Location: Kansas City
- Contact:
With a Christmas gift card and some birthday money, I got a cordless Dremel to help with my Cylon.
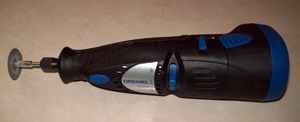
My new toy. (BEWARE! lol)
Worked like a champ on the hard plastic the eye is made from. I got the eye slit cut out in less than 10 min, and on a single charge. (I did snap one cutting circle into three parts learned I had to cut a bit slower).
My new toy. (BEWARE! lol)
Worked like a champ on the hard plastic the eye is made from. I got the eye slit cut out in less than 10 min, and on a single charge. (I did snap one cutting circle into three parts
"All Baseships are now in range to attack the Colonies."
-
Cylon-Knight
- Site Administrator
- Posts: 6432
- Joined: Wed Jul 23, 2008 9:32 pm
- Location: Kansas City
- Contact:
Oops, missed that question, sorry GoldCylon - thanks Swhite228... it is not a Krop helmet it is in fact from starbuckcylon (a.k.a. CORA). It is a great kit! Looking forward to getting the rest of his armor... anyone that wants to donate to help me afford it, just PM me 
UPDATE: I did some more cutting last night with my Dremel - getting the eye area cut out of the helmet halves for the install of the hard plastic eye part. No more busted cutting disk, but I did put a scuff into the bottom of the mouth area with the "neck" of the Dremel by mistake. I said a bad word when it happend A little putty will fix it up.
UPDATE: I did some more cutting last night with my Dremel - getting the eye area cut out of the helmet halves for the install of the hard plastic eye part. No more busted cutting disk, but I did put a scuff into the bottom of the mouth area with the "neck" of the Dremel by mistake. I said a bad word when it happend
"All Baseships are now in range to attack the Colonies."
-
Cylon-Knight
- Site Administrator
- Posts: 6432
- Joined: Wed Jul 23, 2008 9:32 pm
- Location: Kansas City
- Contact:
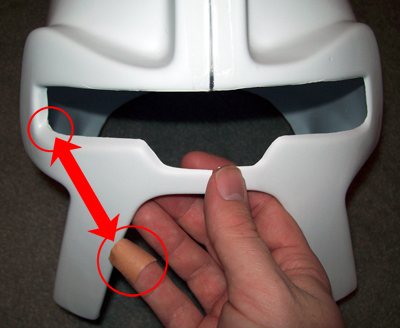
I did some more trimming last night on the eye area with my X-ACTO knife. I didn't finish it yet. (Note the circled corner I have yet to clean up, and the band-aid. I'll let you figure out the rest
So far the eye trim work has been the most work, and I'm still not done with it so the hard plastic eye will fit right. Even after the trim work It will need some putty to get everything smoothed out and looking right.
"All Baseships are now in range to attack the Colonies."
-
Cylon-Knight
- Site Administrator
- Posts: 6432
- Joined: Wed Jul 23, 2008 9:32 pm
- Location: Kansas City
- Contact:
-
Cylon-Knight
- Site Administrator
- Posts: 6432
- Joined: Wed Jul 23, 2008 9:32 pm
- Location: Kansas City
- Contact:
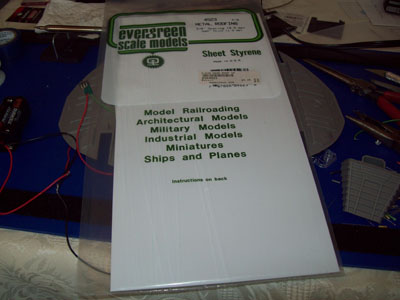
I bought some sheet styrene for my helmet. Going to put in a strip of it on the inside of the mohawk to create a solid seam and backing for putty.
Anyone have tips on what putty to use?
Putty, and a little more trim work to the eye area are next to do. Any putty tips would be appreciated. I am planning on having it Chrome powder coated, so want to avoid anything that would mess up the chroming process. I know to keep away from silicon - so what brand of what putty would be good to use?
"All Baseships are now in range to attack the Colonies."
Who is online
Users browsing this forum: No registered users and 1 guest