Building my Cylon-Knight
-
Cylon-Knight

- Site Administrator
- Posts: 6432
- Joined: Wed Jul 23, 2008 9:32 pm
- Location: Kansas City
- Contact:
Re: Building my Cylon-Knight
Today was another 12 hour day at work but I still have to work on the Cylon. Tonight I did the 2 main ribs real quick to keep at it - they are ready for primer too. I'll post a pic of it tomorrow.
"All Baseships are now in range to attack the Colonies."

-
Cylon-Knight
- Site Administrator
- Posts: 6432
- Joined: Wed Jul 23, 2008 9:32 pm
- Location: Kansas City
- Contact:
Re: Building my Cylon-Knight
Okay - yet another 12 hour work day - but still working on the Centurion.
ONLY 99 DAYS TILL GALACTICON EVERYONE!!!!!

Last night's work, again the main ribs ready for primer.
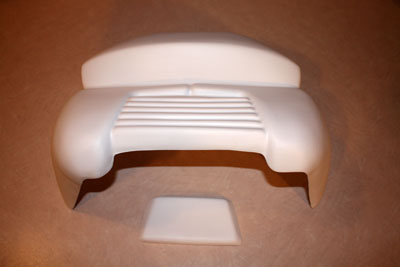
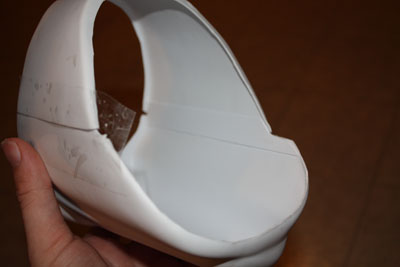
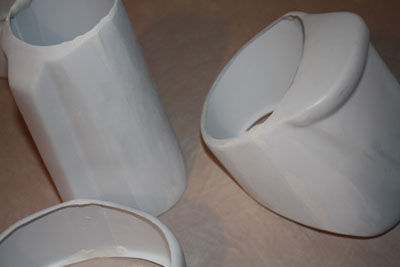
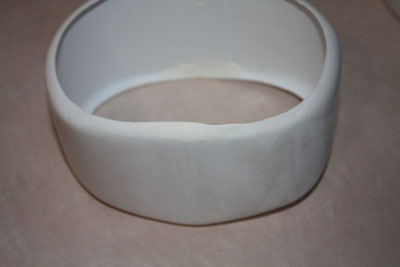
Tonight's work, the chest and neck cap ready for primer. I found my chest armor has two stress cracks already from just the plastic getting REALLY thin where the part is very deep on the side and top edges. I'll have to fix them with some plastic backing and or glue/putty.
ONLY 99 DAYS TILL GALACTICON EVERYONE!!!!!
Last night's work, again the main ribs ready for primer.
Tonight's work, the chest and neck cap ready for primer. I found my chest armor has two stress cracks already from just the plastic getting REALLY thin where the part is very deep on the side and top edges. I'll have to fix them with some plastic backing and or glue/putty.
"All Baseships are now in range to attack the Colonies."
-
Cylon-Knight
- Site Administrator
- Posts: 6432
- Joined: Wed Jul 23, 2008 9:32 pm
- Location: Kansas City
- Contact:
Re: Building my Cylon-Knight
I'm back at it... T.R.O.U.B.L.E. 
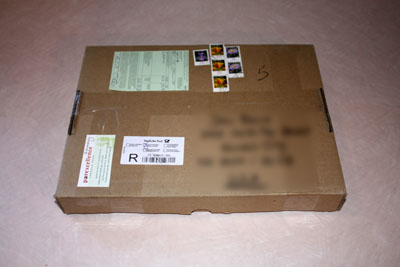
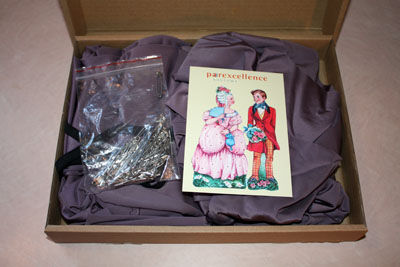
Left: What is in the box!?
Right: It is my test Cylon Centurion Under Suit - all the way from Germany! TOOOOOO COOOOL!
Well, the test suit was too sung, a few emails to the most excellent seamstress ever that our own Red Eye referred me too and.... Suit #2 below
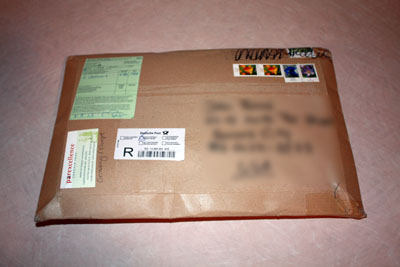
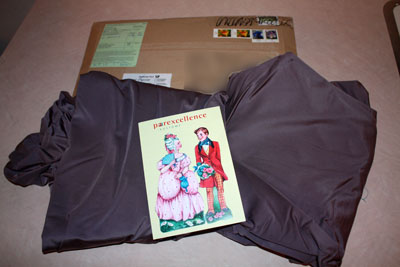
Left: HAPPY MAIL AGAIN!
Right: Suit #2... guess what? PERFECT FIT. All the way from the other side of the world, spot on. Cylon-Knight Mind Approved!
So, my under suit is well in the works and nearly complete. It will land in the USA in early April! Whooo
I am so excited, it is hands down going to rock! A near twin Red Eye's and Jenne's under suits. AND it is going to be here in plenty of time for Galacticon to get everything all 100% done.
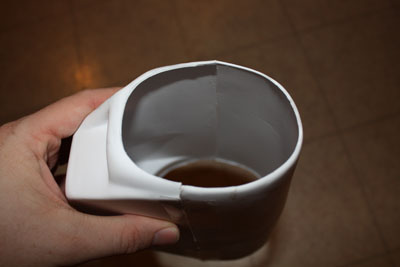
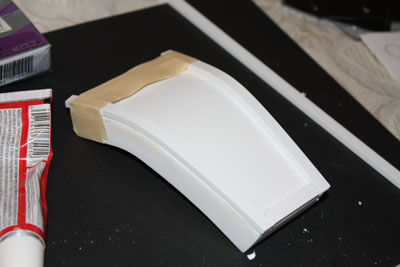
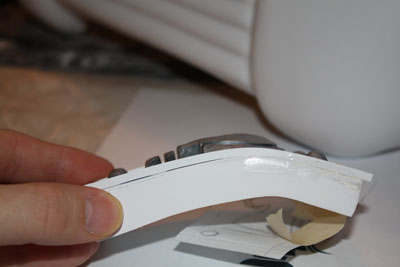
Also, today I fired up my old belt sander and took on one of the last annoying armor "to dos" I needed to tend to. The long straight edges of the arm armor. Five minutes on my old reliable Delta sander and POW, the below photo. I have the two arm armors all ready to fuse. (They are taped now, for the photo.) I am going for the solid part option. I am too nervous that putting chrome tape on/off/on/off that after years the chrome finish will be messed up. So, I'll be putting a sheet plastic bridge on the inside of each seam and then glue/putty, etc. up the parts. I can put tape on them for a 1:1 look, but for lasting power they will be permanently fused.
THUMBS UP! COOL!
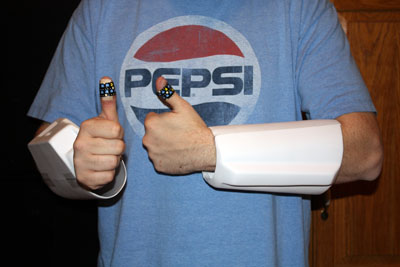
...and yes... dammit... I (again) wound up cutting myself with the X-ACTO doing some fine trim work. This time both thumbs. DANG!


But, Pac Man Band-Aids made may Cylon boo boos all better.
 P.S. CENTURION NOOBS NOTE: Right arm, right armor. Left arm, left armor.
Left: What is in the box!?
Right: It is my test Cylon Centurion Under Suit - all the way from Germany! TOOOOOO COOOOL!
Well, the test suit was too sung, a few emails to the most excellent seamstress ever that our own Red Eye referred me too and.... Suit #2 below
Left: HAPPY MAIL AGAIN!
Right: Suit #2... guess what? PERFECT FIT. All the way from the other side of the world, spot on. Cylon-Knight Mind Approved!
So, my under suit is well in the works and nearly complete. It will land in the USA in early April! Whooo
I am so excited, it is hands down going to rock! A near twin Red Eye's and Jenne's under suits. AND it is going to be here in plenty of time for Galacticon to get everything all 100% done.
Also, today I fired up my old belt sander and took on one of the last annoying armor "to dos" I needed to tend to. The long straight edges of the arm armor. Five minutes on my old reliable Delta sander and POW, the below photo. I have the two arm armors all ready to fuse. (They are taped now, for the photo.) I am going for the solid part option. I am too nervous that putting chrome tape on/off/on/off that after years the chrome finish will be messed up. So, I'll be putting a sheet plastic bridge on the inside of each seam and then glue/putty, etc. up the parts. I can put tape on them for a 1:1 look, but for lasting power they will be permanently fused.
THUMBS UP! COOL!
...and yes... dammit... I (again) wound up cutting myself with the X-ACTO doing some fine trim work. This time both thumbs. DANG!
But, Pac Man Band-Aids made may Cylon boo boos all better.
"All Baseships are now in range to attack the Colonies."
-
Cy
- Raider Commander
- Posts: 240
- Joined: Tue Dec 09, 2008 12:36 am
- Location: Weaverville,Ca
Re: Building my Cylon-Knight
If your not using one, I highly suggest you go buy a carving blade for your Xacto knife. You can get one from Xacto and from other utility knife makers. The blade is curved and has prevented alot of injuries for me while im trimming plastic and wood.
http://www.xacto.com/products/cutting-s ... Knife.aspx
http://www.xacto.com/products/cutting-s ... Knife.aspx
-
Red Eye

- Cylon Empire VIP & BYC.net Gallery Admin
- Posts: 4837
- Joined: Sat May 20, 2006 10:11 am
- Location: Germany
Re: Building my Cylon-Knight
Ouch! Once again you've given your blood for the Empire. Now that's a loyal Cylon! 
Sooo glad to see everything's coming together now. Good work, Centurion!
Sooo glad to see everything's coming together now. Good work, Centurion!
"There can be no survivors. So long as one human remains alive the Alliance is threatened."

-
Jenne

- Flight Leader
- Posts: 375
- Joined: Fri Dec 03, 2010 5:52 pm
- Location: Essen /Germany
Re: Building my Cylon-Knight
Oh yeah cool, sounds very good.Cylon-Knight wrote:
I saw the card in the box and i thought it looks familiar to me :-)
-
Cylon-Knight
- Site Administrator
- Posts: 6432
- Joined: Wed Jul 23, 2008 9:32 pm
- Location: Kansas City
- Contact:
Re: Building my Cylon-Knight
-Thank you for the tip Cy (oh! PUN! X-Acto tip ) I will have to get one of them for sure. I am all for not carving myself up anymore!
-Yes, Red Eye, one of them did bleed. But just one - my left thumb. *Thank goodness* the right thumb was more like a papercut.
-Yes, Jenne, we have matching suits. Dressed to impress - awesome!
OKAY GUYS, I need some Chroming advice.
You might know best GoldCylon or Hand-Schaub... when I get my parts all ready to have plate applied - I need to attach a mounting stick or something?? Where and how does that work?
-Yes, Red Eye, one of them did bleed. But just one - my left thumb. *Thank goodness* the right thumb was more like a papercut.
-Yes, Jenne, we have matching suits.
OKAY GUYS, I need some Chroming advice.
You might know best GoldCylon or Hand-Schaub... when I get my parts all ready to have plate applied - I need to attach a mounting stick or something?? Where and how does that work?
"All Baseships are now in range to attack the Colonies."
-
Cylon-Knight
- Site Administrator
- Posts: 6432
- Joined: Wed Jul 23, 2008 9:32 pm
- Location: Kansas City
- Contact:
Re: Building my Cylon-Knight
^^^ Stiil need any Chrome mount advice...
I worked and worked and worked this entire weekend on my Centurion! Whoooooo
(I found out on Saturday night that this weekend was the weekend of my local Planet KC Comic Con - SO I MISSED IT! FRACK! However I have seen the headliner before - Mr. Sulu - and even though it was closer to me this year, in KC itself, I am okay with missing it. I spend the time on my Centurion so I'm good.)
Left: tape holding the right arm armor together - WEAK!
Right: Some sheet plastic
Left: Glued in sheet plastic - STRONG!
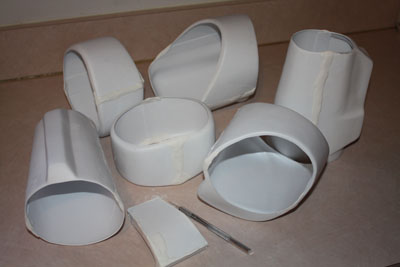
Right: A bicep with the fuse strip as well... I did this to all 6 parts, 2 biceps, 2 forearms and 2 boot armors (Below)
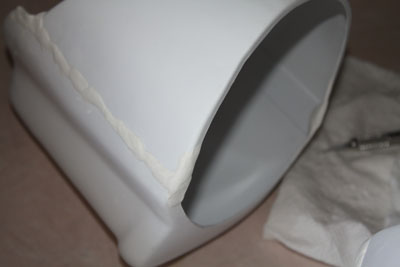
Left: Close up of putty to fill up the seam.
Right: All the fused parts now have putty on them and I let them dry overnight so everything would be ready for sanding.
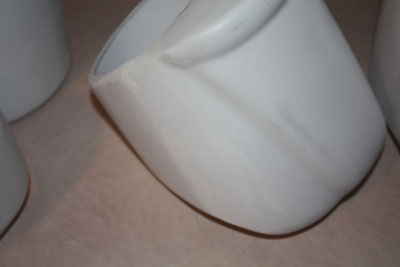
Left / Right and Below: Putty all sanded up. Ready for primer!!!
I was looking into a Custom "Garrison Commander" Insignias set from Skullbeast, but he wouldn't have time to get it done before Galacticon... So I have started to craft my own. It will be a single set, not cast/copied. It is my first scratch built item - SO BE NICE TO ME!
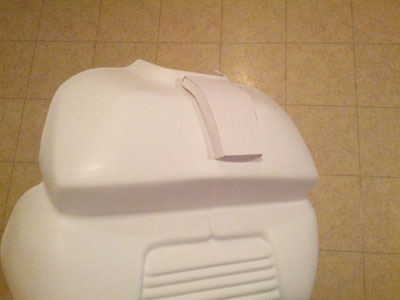
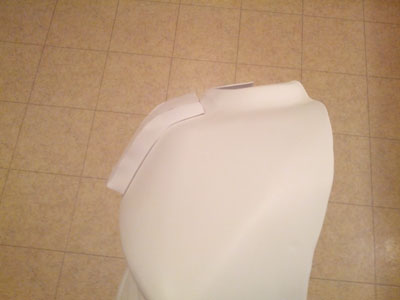
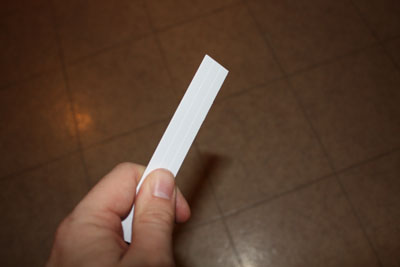
Left / Right: A paper study of the chest insignia. Fitting it to the curve of the chest armor was a mind bender, but I finally got close enough that I was happy.
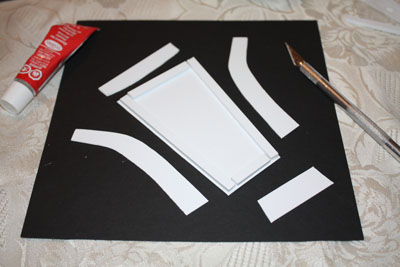
Left: Sheet plastic parts cut from my paper templates
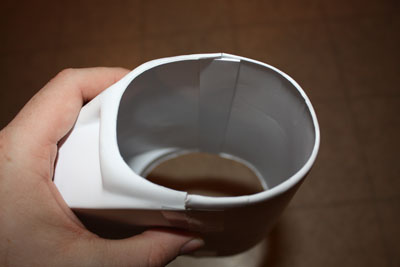
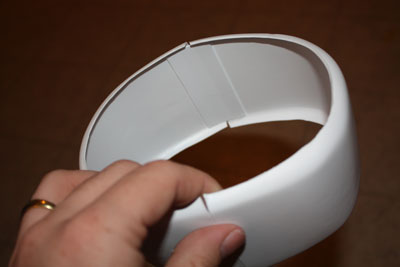
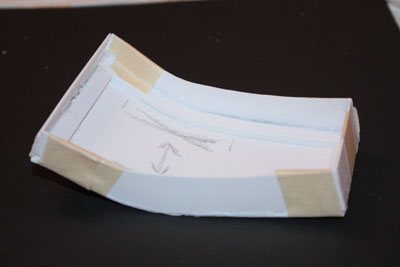
Right: Glue is on... waiting for it to dry. I was not sure at this point if I would keep on with this insignia or consider it a first try and start over. I added bars on the inside to have more area to glue too. If I had cut the sections with a big "X" near it that would have been better. The full length ribbing made bending the parts all in unison REALLY HARD!!! However, it turned out good enough that I was happy with it to continue with it (plus I really didn't want to start over).

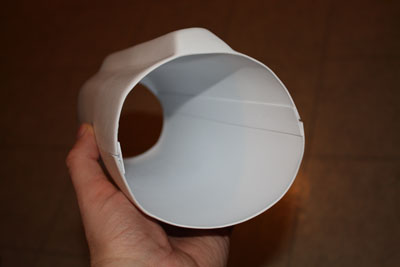
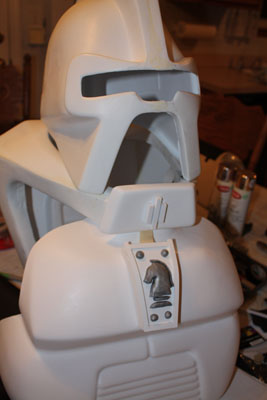
Left / Right: Test fit of the new plastic Insignia base. It is pretty close, I will need to trim up some of the left side to get it to sit flush on the chest armor. The gluing process and bending plastics let one side get a tiny bit out of "square" from my paper master.
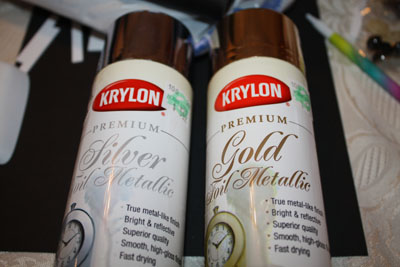
Left: I went to Hobby Lobby for a Centurion supply run... I got some paint for my insignia set. Not going to bother to have the chest one chromed with my armor... I think they look good "slightly" different. And it will let me test this "fancy pants" paint.
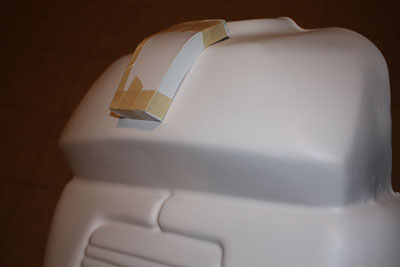
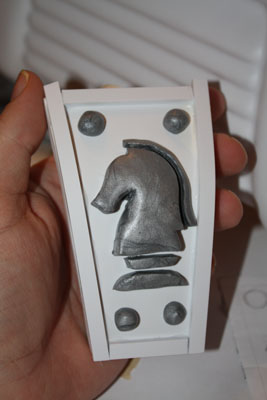
Right: Ahhhhhhhhh my back pack collar cap insignia... can you say... CYLON-KNIGHT
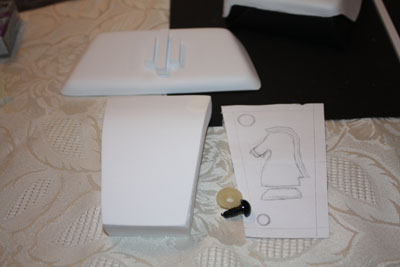
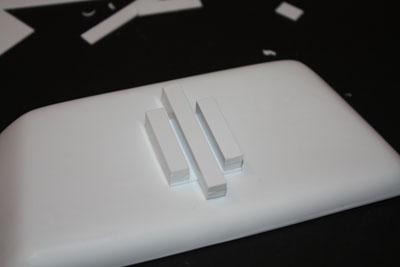
Left: My plan for my chest insignia (Again Knight Rider theme). You can see the black "screw detail" that I'll be adding. I got two sizes of pure black doll eyes that will be perfect in my build. They even have nifty attachment rings for the back. Once painted all silver, they will rock!
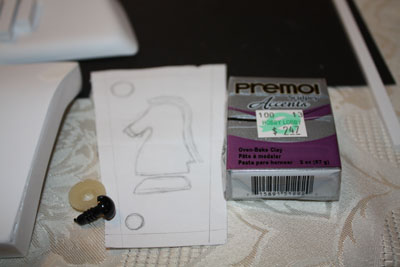
Right: I bought some clay to craft my F.L.A.G. chess piece logo. It is actually silver clay. So once I sculpt it, bake it (to set the clay) I might be able to just tint the edges?! I'll have to see how well it matches the paint with a test later on...
This is how it stands now - I added thee trim on the front. After the glue dries (and I go to work!) I'll add some putty onto this again to fill some spots then it will be ready for the "doll eye screws" and then I can figure out the final size for the F.L.A.G. Knight logo.
WHOOO STILL GOING!
I am going to get a Skullbeast Belt when he get them done up, but they also will not be done in time for Galacticon 3. So I am following the path of our own Nashslash with is wooden blocks he so kindly sent me. I got some "pleather" fabric at Hobby Lobby as well. I had picked up sticky back felt like nashslah used, but then found the fabric and it was on sale and would actually wind up being cheaper to get plus it would match a leather bet better (that I still have to buy).
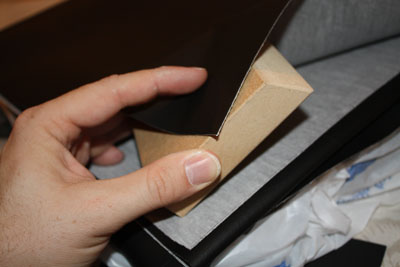
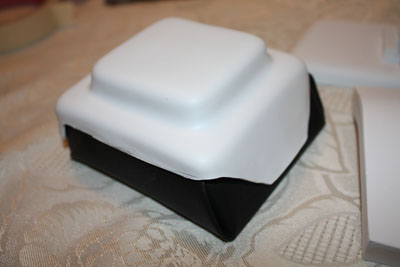
Left: My fabric and the block
Right: Block wrapped in fabric and the cover in place
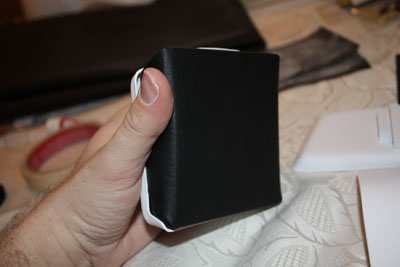

Left: The back, all perfect to go against a belt
Right: My secret... after working and working and WORKING to figure out how to wrap the blocks in fabric and not let the bulk of the fabric get in the way/all messy. I had the idea to put the "ugly" part under the cap! Here I have tape holding it all down just for testing. I will staple into the wood to affix the pleather into place. Then just use screws through a belt into the wood as nashslash did.
BUT WAIT! THERE IS ONE LAST THING
(I told you I worked all weekend on my Centurion)
Anyone need a Baltar be-headed?
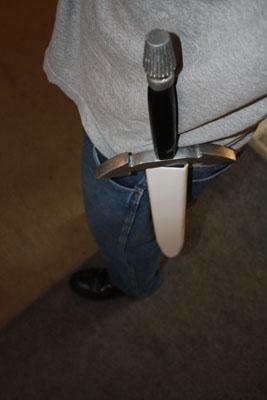
I have my scabbard in the works now too.
Thanks once more to our Cylon-At-Arms, Sean for keeping me armed - ready to deal with lowly humans.
Your sword is AWESOME and the scabbard rocks!!! I need to source a clip for the belt for it. I don't want to glue it shut till I can mount the clip. In this photo I had the scabbard halves taped together and crafted a belt loop out of tape just stuck to the plastic.
I worked and worked and worked this entire weekend on my Centurion! Whoooooo
(I found out on Saturday night that this weekend was the weekend of my local Planet KC Comic Con - SO I MISSED IT! FRACK! However I have seen the headliner before - Mr. Sulu - and even though it was closer to me this year, in KC itself, I am okay with missing it. I spend the time on my Centurion so I'm good.)
Left: tape holding the right arm armor together - WEAK!
Right: Some sheet plastic
Left: Glued in sheet plastic - STRONG!
Right: A bicep with the fuse strip as well... I did this to all 6 parts, 2 biceps, 2 forearms and 2 boot armors (Below)
Left: Close up of putty to fill up the seam.
Right: All the fused parts now have putty on them and I let them dry overnight so everything would be ready for sanding.
Left / Right and Below: Putty all sanded up. Ready for primer!!!
I was looking into a Custom "Garrison Commander" Insignias set from Skullbeast, but he wouldn't have time to get it done before Galacticon... So I have started to craft my own. It will be a single set, not cast/copied. It is my first scratch built item - SO BE NICE TO ME!
Left / Right: A paper study of the chest insignia. Fitting it to the curve of the chest armor was a mind bender, but I finally got close enough that I was happy.
Left: Sheet plastic parts cut from my paper templates
Right: Glue is on... waiting for it to dry. I was not sure at this point if I would keep on with this insignia or consider it a first try and start over. I added bars on the inside to have more area to glue too. If I had cut the sections with a big "X" near it that would have been better. The full length ribbing made bending the parts all in unison REALLY HARD!!! However, it turned out good enough that I was happy with it to continue with it (plus I really didn't want to start over).
Left / Right: Test fit of the new plastic Insignia base. It is pretty close, I will need to trim up some of the left side to get it to sit flush on the chest armor. The gluing process and bending plastics let one side get a tiny bit out of "square" from my paper master.
Left: I went to Hobby Lobby for a Centurion supply run... I got some paint for my insignia set. Not going to bother to have the chest one chromed with my armor... I think they look good "slightly" different. And it will let me test this "fancy pants" paint.
Right: Ahhhhhhhhh my back pack collar cap insignia... can you say... CYLON-KNIGHT
Left: My plan for my chest insignia (Again Knight Rider theme). You can see the black "screw detail" that I'll be adding. I got two sizes of pure black doll eyes that will be perfect in my build. They even have nifty attachment rings for the back. Once painted all silver, they will rock!
Right: I bought some clay to craft my F.L.A.G. chess piece logo. It is actually silver clay. So once I sculpt it, bake it (to set the clay) I might be able to just tint the edges?! I'll have to see how well it matches the paint with a test later on...
This is how it stands now - I added thee trim on the front. After the glue dries (and I go to work!) I'll add some putty onto this again to fill some spots then it will be ready for the "doll eye screws" and then I can figure out the final size for the F.L.A.G. Knight logo.
WHOOO STILL GOING!
I am going to get a Skullbeast Belt when he get them done up, but they also will not be done in time for Galacticon 3. So I am following the path of our own Nashslash with is wooden blocks he so kindly sent me. I got some "pleather" fabric at Hobby Lobby as well. I had picked up sticky back felt like nashslah used, but then found the fabric and it was on sale and would actually wind up being cheaper to get plus it would match a leather bet better (that I still have to buy).
Left: My fabric and the block
Right: Block wrapped in fabric and the cover in place
Left: The back, all perfect to go against a belt
Right: My secret... after working and working and WORKING to figure out how to wrap the blocks in fabric and not let the bulk of the fabric get in the way/all messy. I had the idea to put the "ugly" part under the cap!
BUT WAIT! THERE IS ONE LAST THING
(I told you I worked all weekend on my Centurion)
Anyone need a Baltar be-headed?
I have my scabbard in the works now too.
Thanks once more to our Cylon-At-Arms, Sean for keeping me armed - ready to deal with lowly humans.
Your sword is AWESOME and the scabbard rocks!!! I need to source a clip for the belt for it. I don't want to glue it shut till I can mount the clip. In this photo I had the scabbard halves taped together and crafted a belt loop out of tape just stuck to the plastic.
"All Baseships are now in range to attack the Colonies."
-
Big Al

- Command Centurion
- Posts: 1012
- Joined: Tue Jun 07, 2011 3:09 am
- Location: Las Vegas Nevada
Re: Building my Cylon-Knight
Another tip from someone who has worked with alot of plastic.......Variable speed Dremel tool with various grit sanding drums can be used in lu of an exacto for some of your trimming....of course you still need the exacto but with a little pratice you can save yourself alot of skin and blood.......It's not for every trim situation but it works great for alot of it.......I have not made my cylon yet but I have made many large scale R/C aircraft with alot of plastic parts on them.

By Your Command

-
groupleaderzeta
- Squadron Leader
- Posts: 658
- Joined: Thu Nov 18, 2010 8:08 am
- Location: Paraguay
- Contact:
Re: Building my Cylon-Knight
Everything looks good, making great progress. I am wondering, how thick is the lower chest piece you are making? Seems in the pics to be a bit too thick.
Mine is a roughly 1/4" on top and 3/8" on bottom. Mine appears to be thicker because it don't match the curvature of the chest. When Skullbeast did mine it was patterned on a C.O.R.A. chest, I have a Hand-Schaub chest.
Mine is a roughly 1/4" on top and 3/8" on bottom. Mine appears to be thicker because it don't match the curvature of the chest. When Skullbeast did mine it was patterned on a C.O.R.A. chest, I have a Hand-Schaub chest.
-
Red Eye
- Cylon Empire VIP & BYC.net Gallery Admin
- Posts: 4837
- Joined: Sat May 20, 2006 10:11 am
- Location: Germany
Re: Building my Cylon-Knight
KILLER update!
Everything should be done for Galacticon with ease if you keep working like this!
Glad to see it's coming together now.
Everything should be done for Galacticon with ease if you keep working like this!
Glad to see it's coming together now.
"There can be no survivors. So long as one human remains alive the Alliance is threatened."
-
GoldCylon

- Founder
- Posts: 6948
- Joined: Fri Dec 02, 2005 3:02 pm
- Location: Sacramento
- Contact:
Re: Building my Cylon-Knight
Nice original style touches there you have on the throat plate, on the chest design.
-
Jenne
- Flight Leader
- Posts: 375
- Joined: Fri Dec 03, 2010 5:52 pm
- Location: Essen /Germany
Re: Building my Cylon-Knight
Good work so far :-)
I love cylon wip topics
I love cylon wip topics
-
Cylon-Knight
- Site Administrator
- Posts: 6432
- Joined: Wed Jul 23, 2008 9:32 pm
- Location: Kansas City
- Contact:
Re: Building my Cylon-Knight
@Big Al - oh yes indeed, I got me a Dremel tool. Two actually - battery and cord. Nothing like WHHHHHRRRRRRRR BUZZZZZZ with the ol' Dremel GREAT TIP!
@Zeta - I got your measurements from our chat, thanks! I had always thought my chest bit was a bit "tall" but better to start to tall (I will just trim it) then to be too short. I need to adjust the fit some too so sanding off bits and here was going to happen anyways.
@Red Eye - thanks for your help on the build and measurements as well.
@GoldCylon - Thanks! I want
ed make sure that I'll always stand out in a crowd of Cylons. Hee hee
@Jenne - Thanks! I am happy to do/share more... read on!
Tonight I worked on my clay F.L.A.G. Knight for the chest. I think it came out really well. It is silver clay, and I made it rather thick on purpose to create some interest in it, and aid how it looks from a distance - and just in case it should shrink some when I bake it to set the clay.
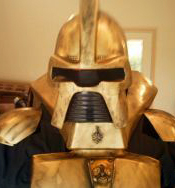
Left: BOO YA! It is the world premier rough draft of Cylon-Knight in... the flesh
Right: My clay logo close up. The bolts are just clay for now - I'll use the plastic doll eyes still when done. I just didn't want to bother with the holes and glue tonight... it was quicker to mock them up in clay for the photos.
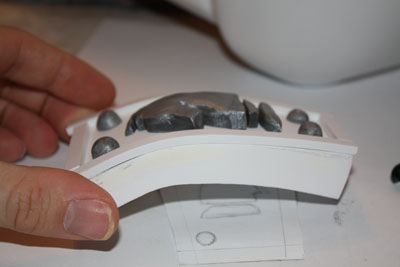
Views of the insignia from the sides. The logo has some height/depth. I think it looks good... not all flat and boring like it would have turned out with a sheet plastic Knight... I hope the clay bakes right. I may have to use a pan or something to ensure it cures curved...
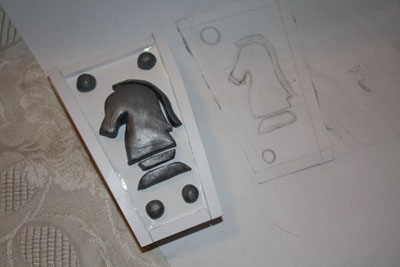
Getting there - my scratch build and my sketch.
...More tomorrow!
@Zeta - I got your measurements from our chat, thanks! I had always thought my chest bit was a bit "tall" but better to start to tall (I will just trim it) then to be too short. I need to adjust the fit some too so sanding off bits and here was going to happen anyways.
@Red Eye - thanks for your help on the build and measurements as well.
@GoldCylon - Thanks! I want
ed make sure that I'll always stand out in a crowd of Cylons. Hee hee
@Jenne - Thanks! I am happy to do/share more... read on!
Tonight I worked on my clay F.L.A.G. Knight for the chest. I think it came out really well. It is silver clay, and I made it rather thick on purpose to create some interest in it, and aid how it looks from a distance - and just in case it should shrink some when I bake it to set the clay.
Left: BOO YA! It is the world premier rough draft of Cylon-Knight in... the flesh
Right: My clay logo close up. The bolts are just clay for now - I'll use the plastic doll eyes still when done. I just didn't want to bother with the holes and glue tonight... it was quicker to mock them up in clay for the photos.
Views of the insignia from the sides. The logo has some height/depth. I think it looks good... not all flat and boring like it would have turned out with a sheet plastic Knight... I hope the clay bakes right. I may have to use a pan or something to ensure it cures curved...
Getting there - my scratch build and my sketch.
...More tomorrow!
"All Baseships are now in range to attack the Colonies."
-
GoldCylon
- Founder
- Posts: 6948
- Joined: Fri Dec 02, 2005 3:02 pm
- Location: Sacramento
- Contact:
Re: Building my Cylon-Knight
Nice work Cylon-Horsey 
Who is online
Users browsing this forum: Bing [Bot] and 1 guest