Page 21 of 29
Re: Building my Cylon-Knight
Posted: Sun Jan 20, 2013 3:13 pm
by rustycylon
cylon helmet looks good in white. Will be superb when chromed. The roving eye is so cool

Re: Building my Cylon-Knight
Posted: Sun Jan 20, 2013 7:23 pm
by goldcylon1
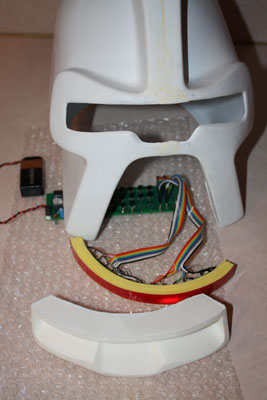
Cylon-Knight wrote:And here are the pics of the new eye showing up...
PHOTOS OR IT DIDN'T HAPPEN


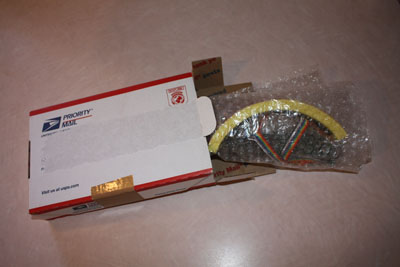
Left: HAPPY MAIL!
Right: Opening up... MY PRECIOUS

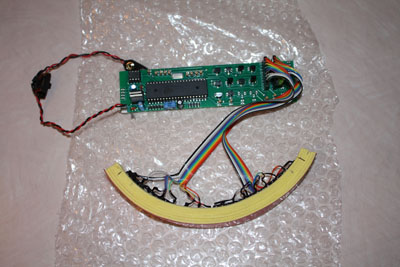
Left: Ahhh, my eye is back and better than ever. NEW AND IMPROVED. And thank you Zeta for the holder too! AWESOME BIRTHDAY GIFT
Right: A 9 volt battery and we are good go.

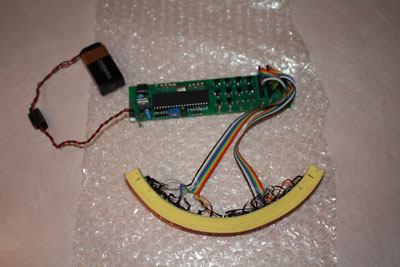
Left: Powered up
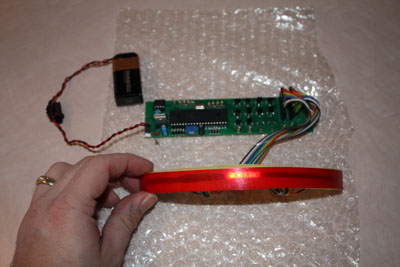
Right: Helmet and eye insert, ready to make a video.
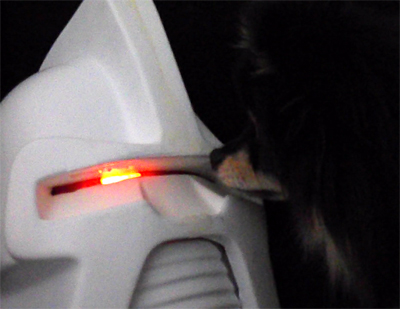
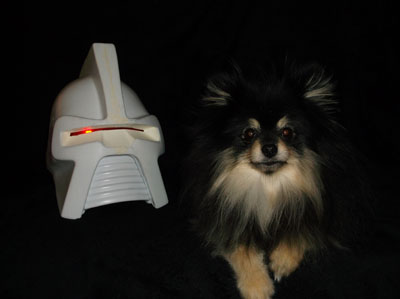
Left: I am trying to make a video and WHO shows up and photo bombs Cylon-Knight??? IT IS CYLON PUPPY!
He cracked me up, he was hypnotized by the eye, watching it go back and forth, back and forth... like watching tennis - his head moving left and right, left and right. LOL
Right: I had him sit for a photo... he says "woof grrr BARK!" to everyone at BYC.net.
Cylon Puppy observes it Dominion

Re: Building my Cylon-Knight
Posted: Mon Jan 21, 2013 12:18 am
by Cylon-Knight
^ You got it right Rusty and GC1 - Chrome will rock and it will make Cylon Puppy crazy me thinks!
RavenLX wrote:Are you making him gold or silver? Looks gold?
Cylon-Knight will be chrome (a "standard Centurion).
The last pic is just aluminum foil as a joke (the silver looks a bit gold just due to the flash, etc.)
I wonder if Goliath was a Cylon!? LOL

Re: Building my Cylon-Knight
Posted: Mon Jan 21, 2013 1:50 am
by RavenLX
Re: Building my Cylon-Knight
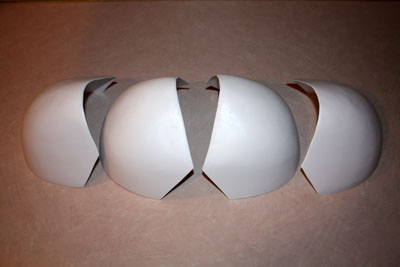
Posted: Sun Feb 10, 2013 11:23 pm
by Cylon-Knight
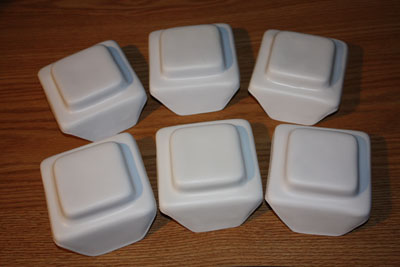
WHOOO HOOO!
Do all you Tin Cans know what the above is a picture of???
HUMMMM!!????
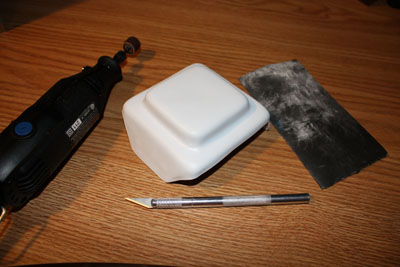
It is the first part of my armor -READY FOR PRIMER!-
...oooooohhhhh yeeeeeeahhh! *Big fat "told-ya-so"* LOL

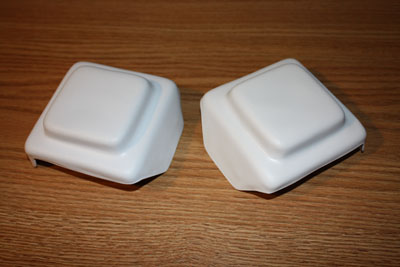
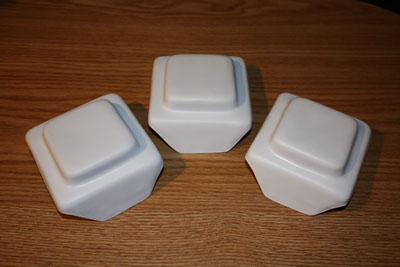
OH, What's that?! Two ready for primer
....and three!
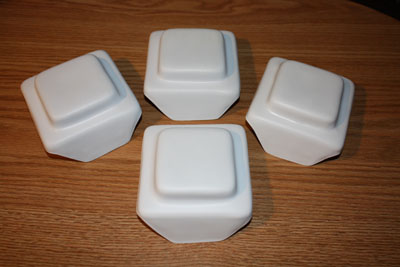
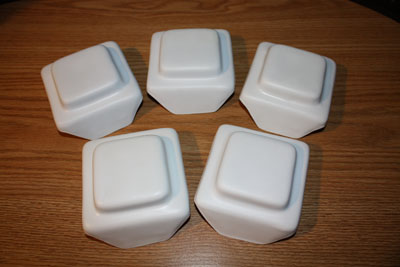
FOUR! FIVE! (Pretend you are The Count on Sesame Street)
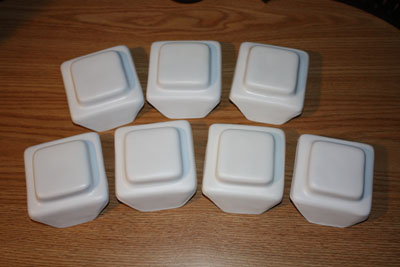
SIX! SEVEN! ah ah ha
All seven battery covers are trimmed up, sanded and ready to prime.
I better slow down, HUH!?
(
I don't really need an answer to that - you "funny" Cylons! 
)
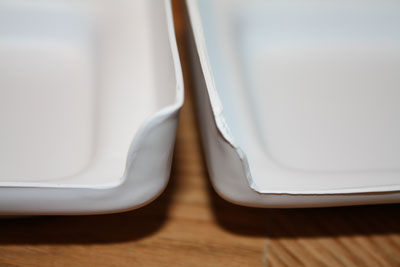
Left is a sanded cover - right is unsanded.
All the edges are in order and I'm ready to get on my way to

Being a Cylon -- all crafty and sneaky -- I have three extra battery belt covers.
I decided to go ahead and get them ready and done just as my original set, so I have some extras if needed.
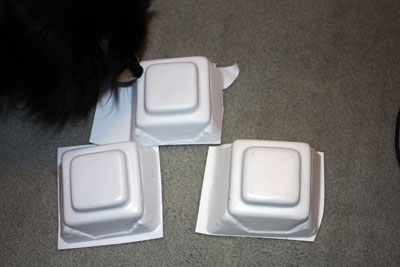
Left: Untrimmed (and there is Cylon Puppy again... always ready to help bring order to the Universe with me).
Right: I got two of them trimmed up, one to go. One of the two is a bad pull, I'll have to do some putty work on a corner, it was too thin and cracked.
:frak:
I figured I'd start out small with getting stuff into primer and with the battery covers I do have the three extras in case I make some learning-curve mistake before I move onto larger parts.
Got good progress today, and made a good sized mess too
CYLONS RULE!
Re: Building my Cylon-Knight
Posted: Sun Feb 10, 2013 11:38 pm
by GoldCylon
I didn't see the photo of the bloody finger.

Hey looks great. Hurry Hurry the window is closing in soon.
Re: Building my Cylon-Knight
Posted: Sun Feb 10, 2013 11:44 pm
by Cylon-Knight
Yes, thankfully, there was no blood this time. I am wearing a red shirt today... ironic?!

Glad you like them GoldCylon
YES - we have 102 days left till Galacticon 3!!! Nearing double digits so I'm going to move like the wind on this.
Spent today on my armor and I've OFFICIALLY got an under suit in the works by the same artist that created Red Eye and Jen's.
I have a list made out and I'm ready to start checking stuff off!
Re: Building my Cylon-Knight
Posted: Sun Feb 10, 2013 11:48 pm
by GoldCylon
OK so stop posting, and start trimming.......well it is late, so as you were.
Re: Building my Cylon-Knight
Posted: Mon Feb 11, 2013 3:48 am
by Red Eye
Thanks for the progress report!
I know you can do it!!!
Re: Building my Cylon-Knight
Posted: Mon Feb 11, 2013 7:45 am
by goldcylon1
Keep it up. Oh BTW Cylon puppy demands a milkbone. Or else random acts of terror will occur. GC1
Re: Building my Cylon-Knight
Posted: Tue Feb 12, 2013 12:02 am
by Cylon-Knight
Thanks guys! Yes - Cylon Puppy LOVES milkbones GC1, yes yes yes. He would gnaw through a Battlestar for some "TREATS" (< He knows that word, and how!
)

Well, tonight -even after 12 hours of work "for the man"- I HAVE to keep at it.
I sanded all of the shoulder bells, they too are now ready for primer. I'll get back to the spare battery belt covers later - I want to get on to the larger parts so when the weather gets a bit better I can spray amost everything at once.
Re: Building my Cylon-Knight
Posted: Tue Feb 12, 2013 2:52 am
by Red Eye
Good work, Centurion. Keep it coming!
Re: Building my Cylon-Knight
Posted: Tue Feb 12, 2013 10:53 am
by goldcylon1
Cylon-Knight wrote:Thanks guys! Yes - Cylon Puppy LOVES milkbones GC1, yes yes yes. He would gnaw through a Battlestar for some "TREATS" (< He knows that word, and how!
)
Well, tonight -even after 12 hours of work "for the man"- I HAVE to keep at it.
I sanded all of the shoulder bells, they too are now ready for primer. I'll get back to the spare battery belt covers later - I want to get on to the larger parts so when the weather gets a bit better I can spray amost everything at once.
How are you going to tier these?
Re: Building my Cylon-Knight
Posted: Tue Feb 12, 2013 6:26 pm
by Cylon-Knight
Velcro to the under suit, and then also velcro between. They will remain 4 non glued parts.
Re: Building my Cylon-Knight
Posted: Tue Feb 12, 2013 9:42 pm
by GoldCylon
Cylon-Knight wrote:Thanks guys! Yes - Cylon Puppy LOVES milkbones GC1, yes yes yes. He would gnaw through a Battlestar for some "TREATS" (< He knows that word, and how!
)
Well, tonight -even after 12 hours of work "for the man"- I HAVE to keep at it.
I sanded all of the shoulder bells, they too are now ready for primer. I'll get back to the spare battery belt covers later - I want to get on to the larger parts so when the weather gets a bit better I can spray amost everything at once.
Four bells? Looks like you need to trim two of them down into 2 inch wide strips to attach on the underside.
