Building my Cylon-Knight

Tips, tricks, inside secrets, help, sources, items used on making the Cylon Centurion suit to wear. Tell us your story, how you came about collecting your parts to a Centurion, or if you own a complete Centurion costume.
Post Reply
User avatar
Cylon-Knight
Site Administrator
Posts: 6432
Joined: Wed Jul 23, 2008 9:32 pm
Location: Kansas City
Contact:

Re: Building my Cylon-Knight

Post by Cylon-Knight » Mon Feb 08, 2010 3:55 pm

Okay, dye for leather... (I know that paint is "correct" for 1:1 but I'm gonna dye my gloves to ensure they STAY black.)

SO - my dye from Fiebing's (pictured on page 9 of my thread here) says to first use Fiebing's Leather Deglazer... So I thought I needed some of that. HOWEVER, check out this listing I found online a bit ago:

Fiebing's Leather Deglazer
Fiebing's Deglazer prepares and deglazes smooth leather for dyeing and refinishing. Will not impair the softness or flexibility of the leather. Rub into leather, wipe off surplus then apply dye. Not recommended for man-made leather. Keep from children's reach! 4 oz

:?: What do you think about that "man-made" leather bit? Are the Cooper gloves real or man-made leather???


"All Baseships are now in range to attack the Colonies."
Image

User avatar
Cylon-Knight
Site Administrator
Posts: 6432
Joined: Wed Jul 23, 2008 9:32 pm
Location: Kansas City
Contact:

Re: Building my Cylon-Knight

Post by Cylon-Knight » Mon Feb 08, 2010 10:50 pm

HERE WE GO! I decided that after about 30 years these gloves don't need deglazed! AND if they are real or man-made leather I had to try to use the dye that I bought. I'm a Cylon and I fear nothing :twisted:

Image
Here is the test subject and applicator wand - THAT HOLDS A LOT! Only dip it a TINY bit into the bottle.
The test subject that was cut off the other night, from the cuff of the hockey glove.

First coat the white was covered - NO trouble at all!
The green still had a little bit showing through the black.

Image
Before and after. This shows three quick coats of dye. LOOKING GOOD :) That is under a flash and you can't see any hints of green (the top right is still green as I had to hold it somewhere).
I didn't apply dye to the COOPER label area - it just sucked up it as it is fabric.

After about 5 minutes it was dry to the touch and is looking good! :) The gloves are so old and used... they dye will bring them a great new life - what to blowed up some Colonials :cylon:

SO - Fiebing's Leather Dye for your Cylon glove mod ...?... Cylon-Knight Mind APPROVED
"All Baseships are now in range to attack the Colonies."
Image

User avatar
Red Eye
Cylon Empire VIP & BYC.net Gallery Admin
Posts: 4837
Joined: Sat May 20, 2006 10:11 am
Location: Germany

Re: Building my Cylon-Knight

Post by Red Eye » Tue Feb 09, 2010 4:54 am

Looks great... if only I'd known that before... than I've used the dye-method as well... :sad:
"There can be no survivors. So long as one human remains alive the Alliance is threatened."

Image

User avatar
GoldCylon
Founder
Posts: 6948
Joined: Fri Dec 02, 2005 3:02 pm
Location: Sacramento
Contact:

Re: Building my Cylon-Knight

Post by GoldCylon » Tue Feb 09, 2010 8:44 am

Awesome out come on the sample piece.

User avatar
Darth Clayton
Raider Pilot
Posts: 156
Joined: Sat Jan 26, 2008 2:34 pm
Location: Indiana

Re: Building my Cylon-Knight

Post by Darth Clayton » Tue Feb 09, 2010 11:09 am

Lookin good! I guess the dye will work on the nylon portions of the glove as well. My set is mostly nylon except for the bottom (cooper writing) and a little bit on the side.. Guess I'll have to get on Tandy's website and order some.. ;)
Jeff
Image

User avatar
Cylon-Knight
Site Administrator
Posts: 6432
Joined: Wed Jul 23, 2008 9:32 pm
Location: Kansas City
Contact:

Re: Building my Cylon-Knight

Post by Cylon-Knight » Sun Feb 14, 2010 7:32 pm

ImageImage
Ready to start to dye my right glove. I found some more applicators at Hobby Lobby... wasn't sure if the ONE that came with the dye would still be good after my test.

ImageImage
Left: Before
Right: After. A good first coat, and a bit of a second. In this photo.
It might take three or four coats I'm guessing - to get everything covered well and every little tiny, deep down area.
I'll need some more dye for the other glove. Used about 1/2 of my bottle so far.

ImageImage
More before and after. The flash really brought out the green that is in the edges still... doesn't seem that way in normal light.
I've got to keep on putting on the dye after it drys out. So far so good.

Check out this video I took while putting on the dye! 4MB in size... download it, or click the link and wait for it to load up :cylon:
LINK: Cylon-Knight Glove Dye
"All Baseships are now in range to attack the Colonies."
Image

User avatar
Tinman
Fallen Centurion - R.I.P.
Posts: 231
Joined: Thu Feb 21, 2008 11:41 am
Location: Arkansas, USA

Re: Building my Cylon-Knight

Post by Tinman » Sun Feb 14, 2010 7:53 pm

Duct Tape is a gift from the GODS!!!!!

:byyourcommand:
TINMAN

User avatar
GoldCylon
Founder
Posts: 6948
Joined: Fri Dec 02, 2005 3:02 pm
Location: Sacramento
Contact:

Re: Building my Cylon-Knight

Post by GoldCylon » Sun Feb 14, 2010 7:54 pm

Nice video, great that you did the speed it up. I was wondering if it was going to be 18 minutes...LoL

User avatar
sean
Flight Leader
Posts: 346
Joined: Sat Dec 05, 2009 1:32 am
Location: florida

Re: Building my Cylon-Knight

Post by sean » Mon Feb 15, 2010 1:51 pm

Looks great......

User avatar
Red Eye
Cylon Empire VIP & BYC.net Gallery Admin
Posts: 4837
Joined: Sat May 20, 2006 10:11 am
Location: Germany

Re: Building my Cylon-Knight

Post by Red Eye » Mon Feb 15, 2010 2:55 pm

Nice and very fast work! :lol:
"There can be no survivors. So long as one human remains alive the Alliance is threatened."

Image

User avatar
Cylon-Knight
Site Administrator
Posts: 6432
Joined: Wed Jul 23, 2008 9:32 pm
Location: Kansas City
Contact:

Re: Building my Cylon-Knight

Post by Cylon-Knight » Wed Mar 10, 2010 11:29 pm

Image
Here we go - some more dye put on tonight... can you guess WHERE?
Down in-between the fingers is being fussy. Since the fingers do not really MOVE that much.
Going to take several coats. My bottle is ALMOST gone now. Probably get two more for the left glove and any touch ups.

I was also thinking I may give some new color to one of my pairs of work shoes. Got a few scuffs on a pair of black shoes. :twisted:
"All Baseships are now in range to attack the Colonies."
Image

User avatar
Cylon-Knight
Site Administrator
Posts: 6432
Joined: Wed Jul 23, 2008 9:32 pm
Location: Kansas City
Contact:

Re: Building my Cylon-Knight

Post by Cylon-Knight » Sun Mar 14, 2010 11:25 pm

Gloves, what Gloves? Okay... Mr. Short Attention span (that's me)... back to the back pack!
I had the back pack roughly trimmed and taped together to just geek out and play with it :oops:
Now I took it all apart and did more trimming to get every part to fit as best as it can for a final assembly.


ImageImage
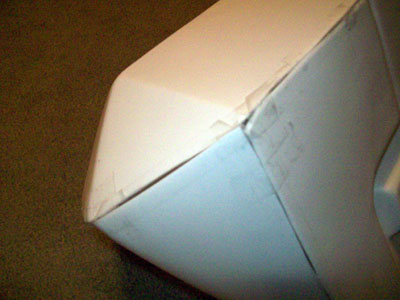
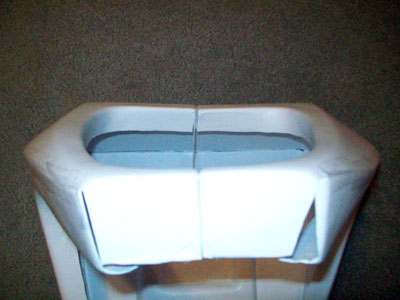
Left top edge, right top edge

ImageImage
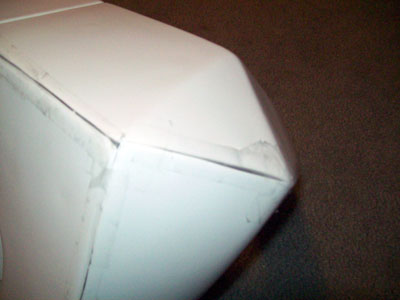
Back, center top edge
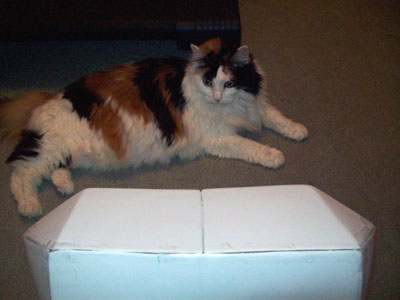
CYLON KITTY says "Good work so far, but hurry up would ya!?"

ImageImage
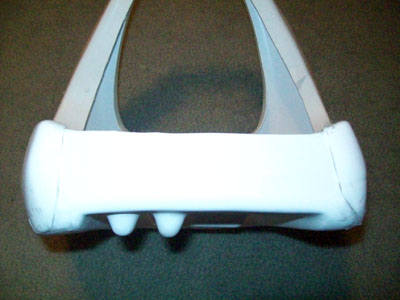
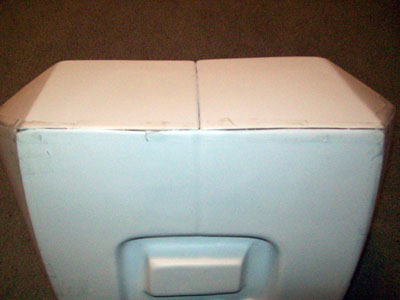
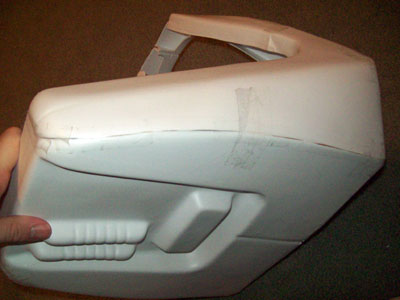
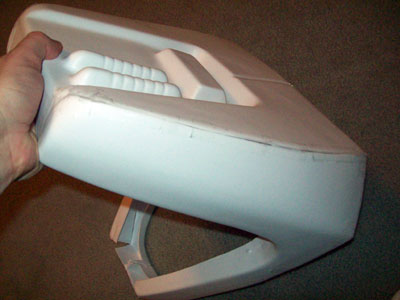
Left: Front without the cap.
Right: Bottom of the back

ImageImage
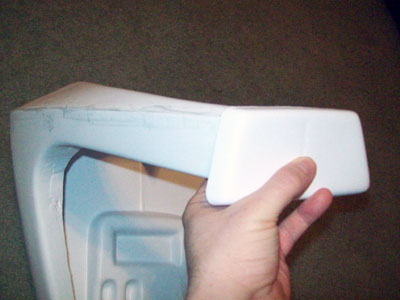
The cap still isn't "right" I couldn't have cut anything wrong... the cap just seems too big to me?!

Image
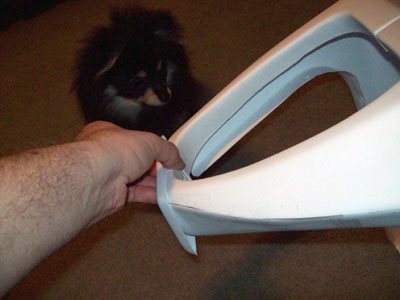
Cylon Puppy showed up to help... we're both puzzled.

ImageImage
On to the seams... here are the sides

ImageImage
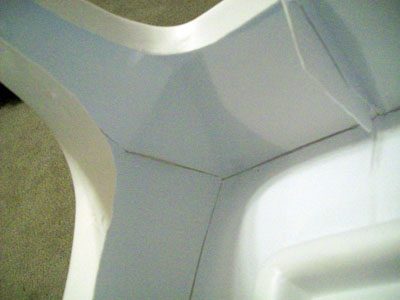
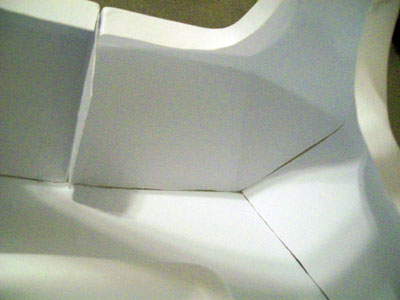
Here are the seams from the inside of the back pack.

I have the back pack together with tape on the outside for now. I plan to put some milliput on the inside of the seams first. This will strengthen up the parts into one unit, and the tape will help keep putty from oozing out all over. Then I'll take the tape off section by section as I apply putty to the outside. Then I can sand and primer this bad boy :twisted:
"All Baseships are now in range to attack the Colonies."
Image

User avatar
GoldCylon
Founder
Posts: 6948
Joined: Fri Dec 02, 2005 3:02 pm
Location: Sacramento
Contact:

Re: Building my Cylon-Knight

Post by GoldCylon » Sun Mar 14, 2010 11:35 pm

Looks great so far, and offering up a side note. The studio used silicon to connect the pieces together. They did this after the pieces were chromed, and in case (ha like this ever happened) a Cylon ever fell, and damaged say the back pack they could just cut away the broken piece, and insert a new piece. Just a side note in case you decide to go trip and fall like a true Cylon.
:lol:

User avatar
Cylon-Knight
Site Administrator
Posts: 6432
Joined: Wed Jul 23, 2008 9:32 pm
Location: Kansas City
Contact:

Re: Building my Cylon-Knight

Post by Cylon-Knight » Sun Mar 14, 2010 11:45 pm

Hummmm that was a great idea they had to keep reusing parts.
But, no, I don
"All Baseships are now in range to attack the Colonies."
Image

User avatar
Red Eye
Cylon Empire VIP & BYC.net Gallery Admin
Posts: 4837
Joined: Sat May 20, 2006 10:11 am
Location: Germany

Re: Building my Cylon-Knight

Post by Red Eye » Mon Mar 15, 2010 4:59 am

Nice work again you've done there.

I wouldn't be worried about the size of the front cap.

The original caps were overlapped as well:

Image Image
"There can be no survivors. So long as one human remains alive the Alliance is threatened."

Image

Post Reply

Return to “Centurion Builders' Forum”

Who is online

Users browsing this forum: No registered users and 7 guests