Metasequoia, Pepakura, and the like
-
RAM_Doubler
- Patrol Leader
- Posts: 78
- Joined: Sun Nov 30, 2014 6:43 pm
- Location: Kansas City
Post
by RAM_Doubler » Tue Feb 24, 2015 9:27 pm
Details and progress on resin coating and painting my pepakura Cylon Centurian.
See the pep build details for my build here -
viewtopic.php?f=80&t=2788
Build notes:
- For research, read posts like this - http://snypa.co.uk/basics-prop-making-i ... ibreglass/, and watched all of these videos https://www.youtube.com/channel/UC2kInw ... vvOGqwggAw. I read and watched a lot of others, but found myself going back to these two most often to decide how I wanted to approach the resin work on this build.
- My build was during the winter, so I had to choose a resin I could work with indoors. SmoothCast 321 seemed to be a common choice among pep builders, and has worked well for me. I bought it here - http://www.reynoldsam.com/product/smooth-cast-320/. I used just over 2 of the trial-sized sets for all of the resin coating, fiberglass cloth, and filler.
- Bondo and similar products used for forming and shaping aren't an option indoors, so I'm using a fairing filler to thicken the resin. You can add as much as you need to make a paste to build up curves and fill in low spots. It seems to be durable yet easy to sand. This is what I bought http://www.westsystem.com/ss/410-microlight/
- The recommended primer for SmoothCast epoxy resin is Plastikote Sandable Primer - http://www.amazon.com/PlastiKote-T-235- ... B000CPAA3A
- I did 2 coats of resin on the outside, 1 coat on the inside, and then reinforced the inside with fiberglass cloth.
Updates will come as I get time - still trying to finish in time for Planet Comicon 2015 here in KC...a mere 17 days away!

-
RAM_Doubler
- Patrol Leader
- Posts: 78
- Joined: Sun Nov 30, 2014 6:43 pm
- Location: Kansas City
-
RAM_Doubler
- Patrol Leader
- Posts: 78
- Joined: Sun Nov 30, 2014 6:43 pm
- Location: Kansas City
Post
by RAM_Doubler » Tue Feb 24, 2015 10:01 pm
I found that I needed a ton of space to work on. I'm using 3ft x 8ft table, plus hanging parts and putting them on shelves.
Applying the resin is pretty straightforward. Completely cover each piece, but not so much that there's excess that runs. You just have to sand those drips off later...no reason to make more work for yourself.
-
Attachments
-
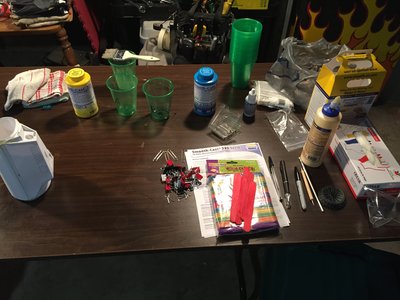
- Here's my basic set up. It got pretty crowded as I added more and more supplies.
-
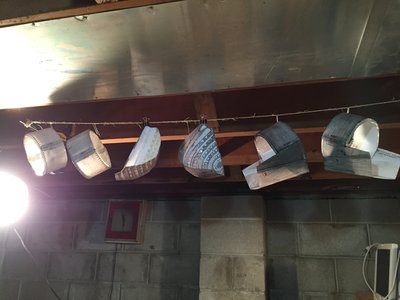
- I used binder clips and bent paperclips to hang parts after brushing on the resin.
-
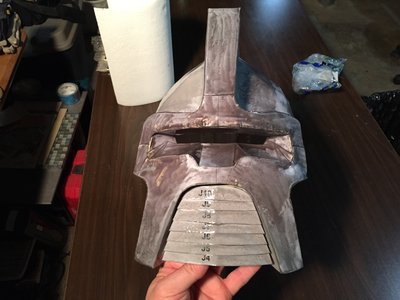
- Helmet looks a lot more menacing with even just one coat of resin applied.
-
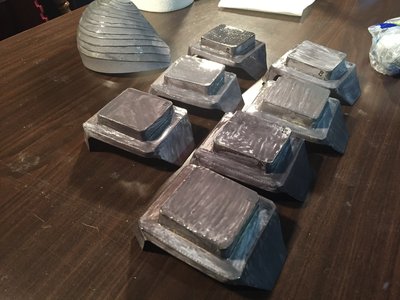
- I used the buckles to experiment how cured the resin could be before I had to stop using it. You can see that trying to apply the thickened resin starts to really make the finished pieces look pretty rough.
Last edited by
RAM_Doubler on Tue Feb 24, 2015 10:15 pm, edited 1 time in total.
-
RAM_Doubler
- Patrol Leader
- Posts: 78
- Joined: Sun Nov 30, 2014 6:43 pm
- Location: Kansas City
Post
by RAM_Doubler » Tue Feb 24, 2015 10:04 pm
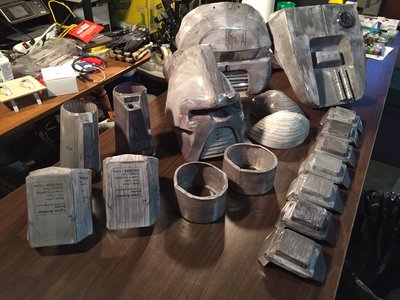
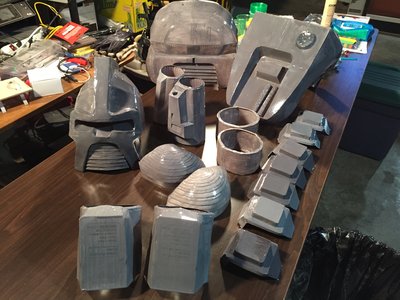
Here you can see the difference between one coat and 2 coats of resin. It's surprising how even a couple thin coats can really harden up your pepakura.
I lightly sanded between resin coats, just to clean up rough spots and to remove errant brush bristles that got stuck.
-
Attachments
-
-
-
RAM_Doubler
- Patrol Leader
- Posts: 78
- Joined: Sun Nov 30, 2014 6:43 pm
- Location: Kansas City
-
rustycylon
- Squadron Leader
- Posts: 583
- Joined: Sun Apr 29, 2012 7:35 am
- Location: West Midlands UK
Post
by rustycylon » Wed Feb 25, 2015 3:10 pm
good work, I don't like working with fiberglass but it has its uses.
-
RAM_Doubler
- Patrol Leader
- Posts: 78
- Joined: Sun Nov 30, 2014 6:43 pm
- Location: Kansas City
Post
by RAM_Doubler » Mon Mar 02, 2015 8:56 pm
rustycylon wrote:good work, I don't like working with fiberglass but it has its uses.
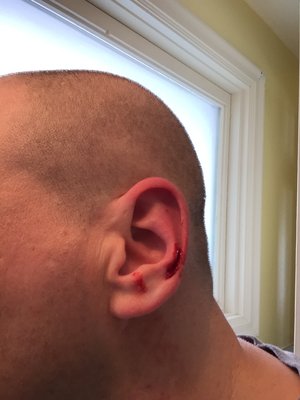
Prophetic words, rustycylon... I did a test fit before lining the inside of the helmet with foam and the edge of some hardened fiberglass gave me a healthy scratch.

Probably the third time the fiberglass has bitten me enough to draw blood.
So, if you're doing a build like this, watch for sharp edges!
-
Attachments
-
- Centurian RAM-Doubler draws first blood...
-
RAM_Doubler
- Patrol Leader
- Posts: 78
- Joined: Sun Nov 30, 2014 6:43 pm
- Location: Kansas City
-
RAM_Doubler
- Patrol Leader
- Posts: 78
- Joined: Sun Nov 30, 2014 6:43 pm
- Location: Kansas City
-
RAM_Doubler
- Patrol Leader
- Posts: 78
- Joined: Sun Nov 30, 2014 6:43 pm
- Location: Kansas City
Post
by RAM_Doubler » Mon Mar 02, 2015 9:14 pm
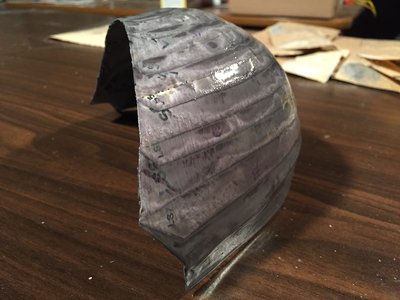
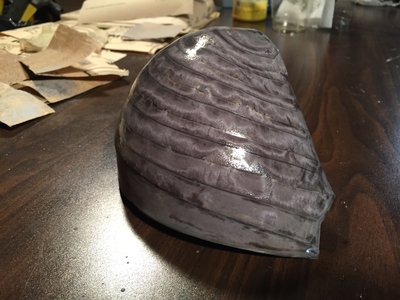
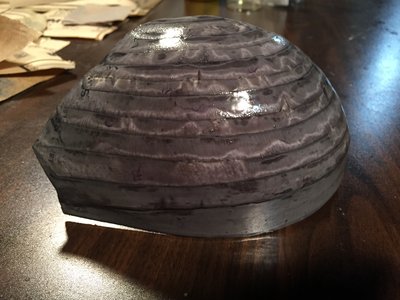
I ended up with a coat of resin on the shoulder bells that never quite dried. It stayed tacky for 2 days, and I finally just sanded it off (while gumming up the sandpaper big time).
I'm still working on the shoulder bells, and am not fully convinced I'll ever get them completely smooth.
-
Attachments
-
-
-
Last edited by
RAM_Doubler on Tue Mar 03, 2015 10:12 am, edited 1 time in total.
-
RAM_Doubler
- Patrol Leader
- Posts: 78
- Joined: Sun Nov 30, 2014 6:43 pm
- Location: Kansas City
-
RAM_Doubler
- Patrol Leader
- Posts: 78
- Joined: Sun Nov 30, 2014 6:43 pm
- Location: Kansas City
-
RAM_Doubler
- Patrol Leader
- Posts: 78
- Joined: Sun Nov 30, 2014 6:43 pm
- Location: Kansas City
-
RAM_Doubler
- Patrol Leader
- Posts: 78
- Joined: Sun Nov 30, 2014 6:43 pm
- Location: Kansas City
-
RAM_Doubler
- Patrol Leader
- Posts: 78
- Joined: Sun Nov 30, 2014 6:43 pm
- Location: Kansas City
Who is online
Users browsing this forum: No registered users and 1 guest
