Building my Cylon-Knight
-
groupleaderzeta
- Squadron Leader
- Posts: 658
- Joined: Thu Nov 18, 2010 8:08 am
- Location: Paraguay
- Contact:
Re: Building my Cylon-Knight
I second that. Great look. Should be interesting if we had others with different insignia at a con. Perhaps a star or a leaf anything would be possible.
-
Big Al

- Command Centurion
- Posts: 1012
- Joined: Tue Jun 07, 2011 3:09 am
- Location: Las Vegas Nevada


-
SiR-ROUND

- Moderator
- Posts: 316
- Joined: Wed Jun 11, 2008 9:29 am
- Location: Megacity Holland
Re: Building my Cylon-Knight
Looks horrendously awesome!
Send from my Galaxy phone.
Send from my Galaxy phone.
-
Red Eye

- Cylon Empire VIP & BYC.net Gallery Admin
- Posts: 4837
- Joined: Sat May 20, 2006 10:11 am
- Location: Germany
Re: Building my Cylon-Knight
The F.L.A.G. insignia looks brilliant!
Hats... sorry... helmets off my friend!
Hats... sorry... helmets off my friend!
"There can be no survivors. So long as one human remains alive the Alliance is threatened."

-
Hand-Schaub

- First Centurion
- Posts: 756
- Joined: Mon Dec 29, 2008 9:05 am
- Location: Sacramento, CA
Re: Building my Cylon-Knight
Nice blend of insignias. It looks in place! Are you planning to black chrome the whole thing?
-
Cylon-Knight

- Site Administrator
- Posts: 6418
- Joined: Wed Jul 23, 2008 9:32 pm
- Location: Kansas City
- Contact:
Re: Building my Cylon-Knight
Thanks guys for all the kind words, glad you like it 
@Zeta, you are right, all customs would look so cool in a group!
@Hand-Schaub - I had not thought of that.... hummmm.... VERY COOL IDEA!
More update - and a BIG HUGE ONE OF AWESOME IT IS (I type like Yoda now... )
)
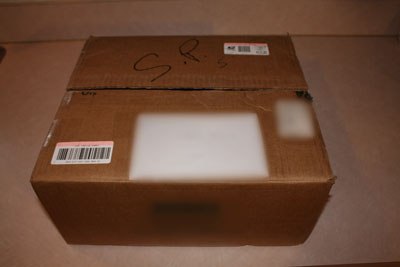
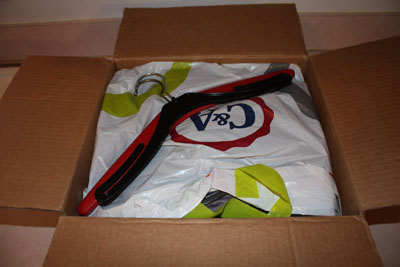
Left: OH HAPPY, HAPPY MAIL!!!!!!!!!!
Right: Yes, two hangers... hummm
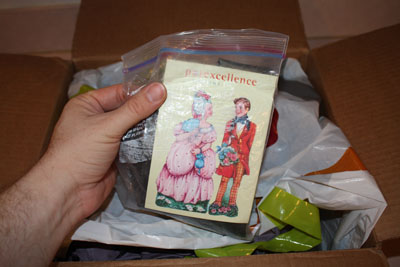
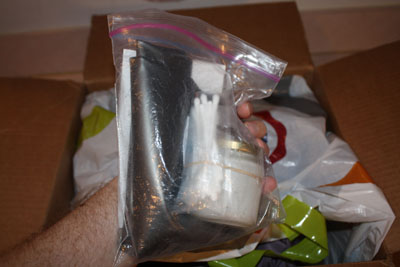
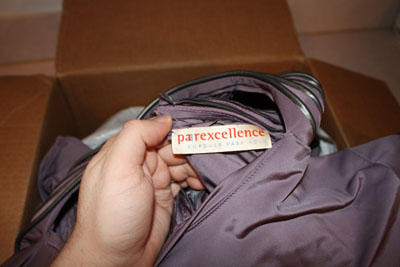
Left: parexcellence - SWEET!
Right: Some assembly required Extra vinyl for me to attach to my glove cuffs. And everything I need to do it! A+++
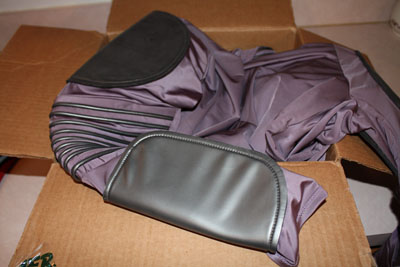
Left: Look a Centurion is climbing out of a box!
Right: MORE parexcellence - SWEET!
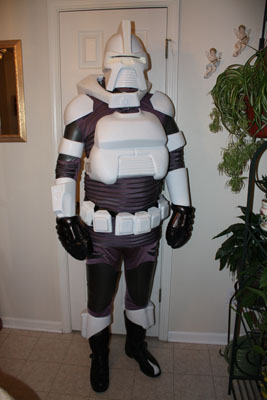
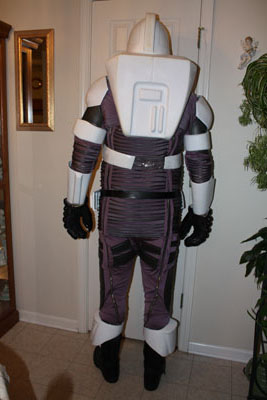
Left: The Centurion is out of the box!
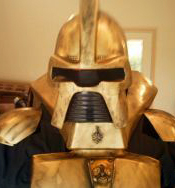
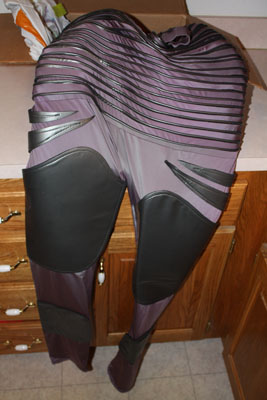
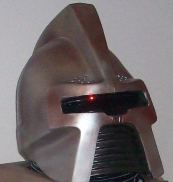
Center & Right... why, that's ME! whooooooooooooooooooooooooooooo
Yes, I need another rib yet, and I didn't mess with the skirting for the photo, and the belt is really ghetto, but I was too excited to SUIT UP! Hell Ya!

After testing out my under suit - which I love, it was so worth the $, I kept on working - back to my belt for Galacticon 3 (that will eventually be replaced by one of Skullbeast's masterpiece replica belts).
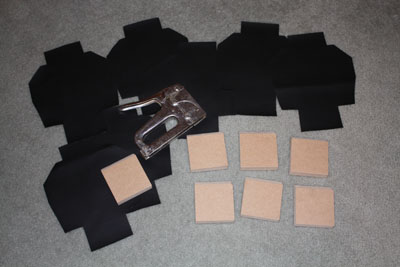
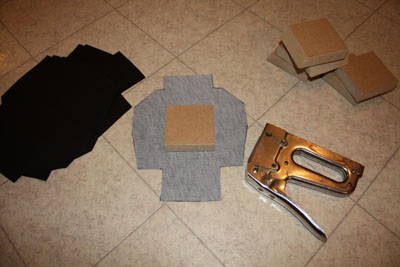
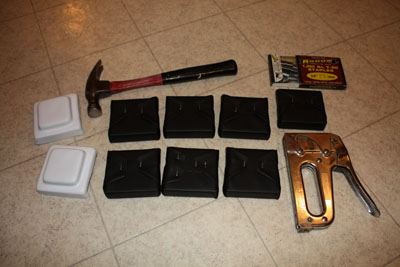
Left: My pile of blocks and newly cut "pleather" wraps
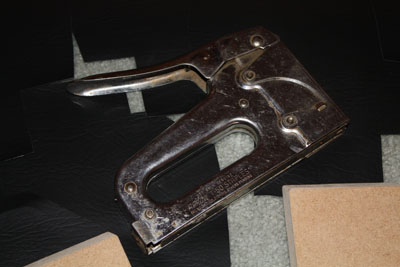
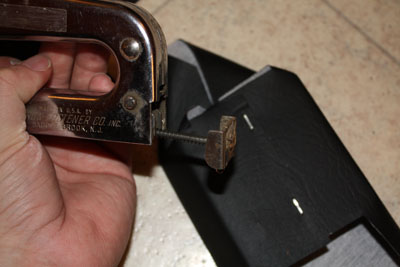
Right: One of my good ol' staple guns *pew* *pew*
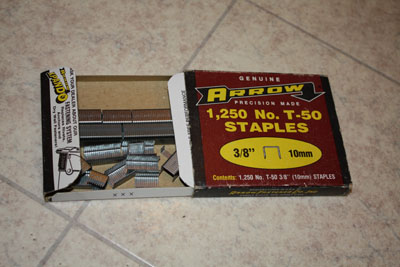
Left: The staples I used. The first two were actually 1/4" but then a third never wanted to "shoot" and I decided they would be too short after the fabric gets thicker as the wrap progresses... so I went to 3/8ths. I have 1/2" too but I thought that was a bit much too much.
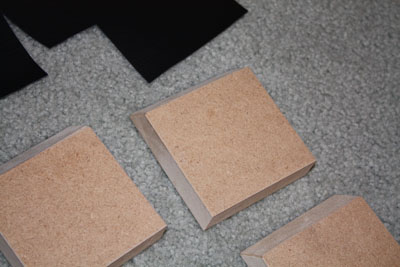
Right: My perfect set of Cylon Belt Blocks from our own Nashslash - expert craftsmanship!!! Thank you Nashslash!!!
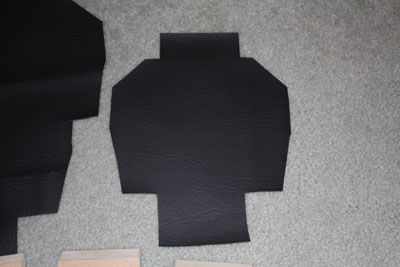
Left: My wrap. After many tests with paper and a bit of pleather this shape works the best for me.
Right: Here we go...
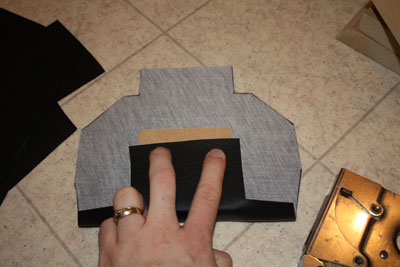

Left: Pointing where the first staples go.
Right: Stapled.
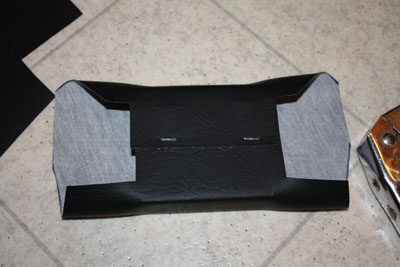
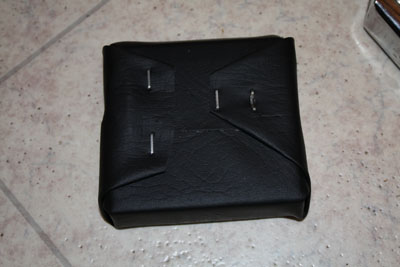
Left: Two more staples
Right: And there is one end done.
Left: Close up of how the finished corners look before I staple it
Right: What?! No staple... oh... the lock got loose... oops
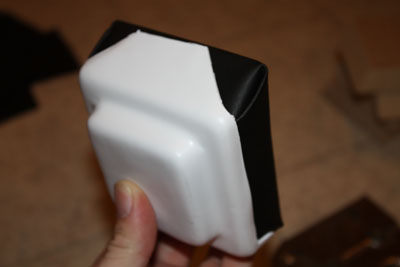
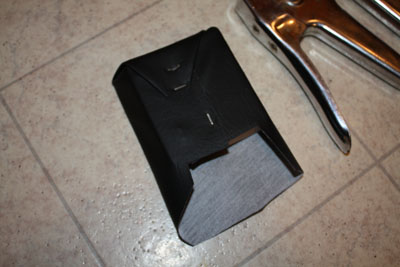
Left: The first one all done! Not all that pretty without the cap...
Right: MUCH BETTER!
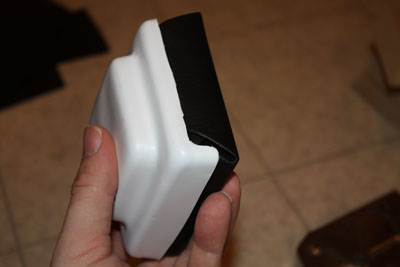
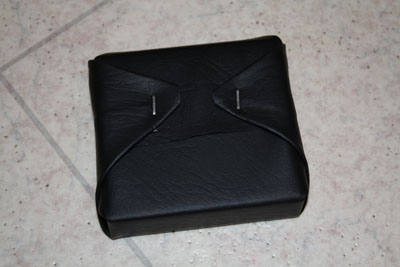
Left: View from another angle
Right: Block #2 wrapped up. Rock n' roll!
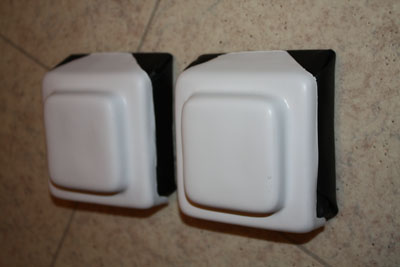
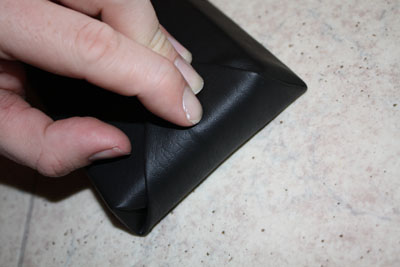
Left: Two down, 5 more to go
Right: All done! I had to get a hammer to get a few staples down flush.
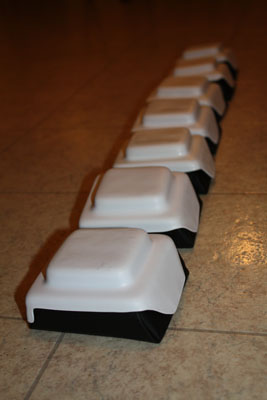
7 Little Belt Boxes. Now I need to get a wide belt at a store to mount them on and I will be good to go belt wise for Galacticon.
I'll have more on my under suit later too... stay tuned Cylon Brothers!
@Zeta, you are right, all customs would look so cool in a group!
@Hand-Schaub - I had not thought of that.... hummmm.... VERY COOL IDEA!
More update - and a BIG HUGE ONE OF AWESOME IT IS (I type like Yoda now...
Left: OH HAPPY, HAPPY MAIL!!!!!!!!!!
Right: Yes, two hangers... hummm
Left: parexcellence - SWEET!
Right: Some assembly required
Left: Look a Centurion is climbing out of a box!
Right: MORE parexcellence - SWEET!
Left: The Centurion is out of the box!
Center & Right... why, that's ME! whooooooooooooooooooooooooooooo
Yes, I need another rib yet, and I didn't mess with the skirting for the photo, and the belt is really ghetto, but I was too excited to SUIT UP! Hell Ya!
After testing out my under suit - which I love, it was so worth the $, I kept on working - back to my belt for Galacticon 3 (that will eventually be replaced by one of Skullbeast's masterpiece replica belts).
Left: My pile of blocks and newly cut "pleather" wraps
Right: One of my good ol' staple guns *pew* *pew*
Left: The staples I used. The first two were actually 1/4" but then a third never wanted to "shoot" and I decided they would be too short after the fabric gets thicker as the wrap progresses... so I went to 3/8ths. I have 1/2" too but I thought that was a bit much too much.
Right: My perfect set of Cylon Belt Blocks from our own Nashslash - expert craftsmanship!!! Thank you Nashslash!!!
Left: My wrap. After many tests with paper and a bit of pleather this shape works the best for me.
Right: Here we go...
Left: Pointing where the first staples go.
Right: Stapled.
Left: Two more staples
Right: And there is one end done.
Left: Close up of how the finished corners look before I staple it
Right: What?! No staple... oh... the lock got loose... oops
Left: The first one all done! Not all that pretty without the cap...
Right: MUCH BETTER!
Left: View from another angle
Right: Block #2 wrapped up. Rock n' roll!
Left: Two down, 5 more to go
Right: All done! I had to get a hammer to get a few staples down flush.
7 Little Belt Boxes. Now I need to get a wide belt at a store to mount them on and I will be good to go belt wise for Galacticon.
I'll have more on my under suit later too... stay tuned Cylon Brothers!
"All Baseships are now in range to attack the Colonies."

-
Hand-Schaub
- First Centurion
- Posts: 756
- Joined: Mon Dec 29, 2008 9:05 am
- Location: Sacramento, CA
Re: Building my Cylon-Knight
Wow! Super awesome update!
-
rustycylon
- Squadron Leader
- Posts: 583
- Joined: Sun Apr 29, 2012 7:35 am
- Location: West Midlands UK
Re: Building my Cylon-Knight
looking very smart. So wish I could make it to galacticon3 
-
GoldCylon

- Founder
- Posts: 6945
- Joined: Fri Dec 02, 2005 3:02 pm
- Location: Sacramento
- Contact:
Re: Building my Cylon-Knight
Hey you stapled it (nailed)  . Good work, and nice suit. Hurry up, and chrome up. Unless yu are going as the White-Knight.
-
Red Eye
- Cylon Empire VIP & BYC.net Gallery Admin
- Posts: 4837
- Joined: Sat May 20, 2006 10:11 am
- Location: Germany
Re: Building my Cylon-Knight
Congrats on getting your undersuit!
Hope you like it.
Hope you like it.
"There can be no survivors. So long as one human remains alive the Alliance is threatened."
-
jclayman99

- Raider Commander
- Posts: 254
- Joined: Mon Jun 06, 2011 5:08 pm
- Location: Santa Clarita, CA
Re: Building my Cylon-Knight
nice work. looking good.
If "they" say it can't be done, it just means "they" cant do it.
JCLAY
JCLAY
-
Cylon-Knight
- Site Administrator
- Posts: 6418
- Joined: Wed Jul 23, 2008 9:32 pm
- Location: Kansas City
- Contact:
Re: Building my Cylon-Knight
Thanks guys!
Today at work stunk, on top of that I ignored a bunch of "homework" that will make tomorrow sour... OH WELL - EVIL CYLON. (Maybe my boss will staff us correctly SOMEDAY? *I hope*)
So, tonight after getting home late and doing "grown up stuff" like taxes, bills and such (GROSS) - I only had time to try the under suit more, test the skirting and such. And I am going to do more leg work for the chrome. No photos to post for that, sorry.
CHROME:
I am going to try to get a quote from an online place as a fall back - and call some shops in town tomorrow that I know only do metal. I am hoping they might know another local company that does plastic. We will see... FINGERS CROSSED
"All Baseships are now in range to attack the Colonies."
-
Jenne

- Flight Leader
- Posts: 374
- Joined: Fri Dec 03, 2010 5:52 pm
- Location: Essen /Germany
Re: Building my Cylon-Knight
I was by Cordula today, and she told me that your undersuit must be in your hands this week.
So i see, the suit arrived safe :-) She trust not really the post office, so she gave a friend of her the suit to take him with the airplane over to the US. And ship it from a US post office :-)
Be sure to store your suit in a cupboard later. The latex didn
So i see, the suit arrived safe :-) She trust not really the post office, so she gave a friend of her the suit to take him with the airplane over to the US. And ship it from a US post office :-)
Be sure to store your suit in a cupboard later. The latex didn
-
Cylon-Knight
- Site Administrator
- Posts: 6418
- Joined: Wed Jul 23, 2008 9:32 pm
- Location: Kansas City
- Contact:
Re: Building my Cylon-Knight
That's awesome you got to see Cordula! Be sure to tell her Hi for me if you see here again. Yes the fit is wonderful, she did EXCELLENT WORK!!! Thank you for the tips on the sun, etc. Good to know.
Tonight's Update:
Sanding done on the last armor item. Now only touch ups to deal with.
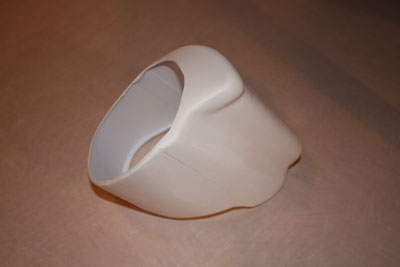
Left: My back pack after some more sanding and I added plastic to the collar for strength.
Right: back pack, looking good!

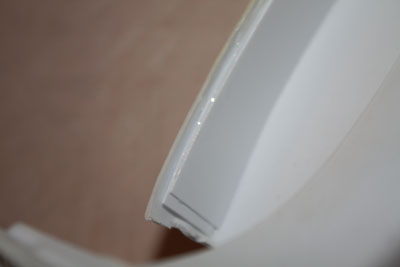
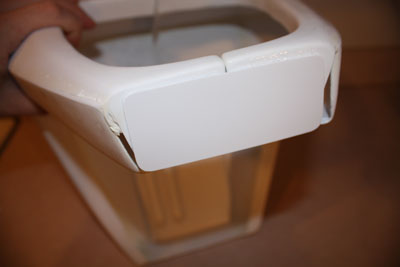
Left: I also added some plastic inside the back pack for strength. I didn't trim down to what I see as the edge of the "true" part - left some of the extra plastic to give a wider lip. It was rather thin as the plastic was intended to be trimmed... but I thought a larger lip would be stronger and help it "wear" better - more confortable.
Right: A close up of the added plastic strips. I did two thin layers so far. I may add a third. I learned my lesson trying to bend thick plastic too far. Lots of thin strips is the way to go!
In other news - mad shout out to Hand-Schaub. He is going to help Cylon-White become Cylon-Knight. My chrome problems were driving me nuts and he saved me. I am going to use the same shop he has been working with. I am really excited for a great shop to do the work on my Chrome.
Tonight's Update:
Sanding done on the last armor item. Now only touch ups to deal with.
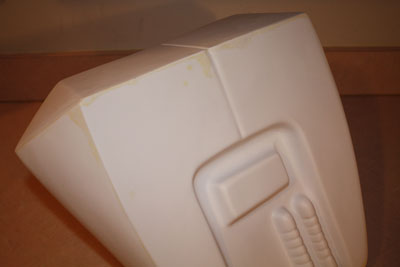
Left: My back pack after some more sanding and I added plastic to the collar for strength.
Right: back pack, looking good!
Left: I also added some plastic inside the back pack for strength. I didn't trim down to what I see as the edge of the "true" part - left some of the extra plastic to give a wider lip. It was rather thin as the plastic was intended to be trimmed... but I thought a larger lip would be stronger and help it "wear" better - more confortable.
Right: A close up of the added plastic strips. I did two thin layers so far. I may add a third. I learned my lesson trying to bend thick plastic too far. Lots of thin strips is the way to go!
In other news - mad shout out to Hand-Schaub. He is going to help Cylon-White become Cylon-Knight. My chrome problems were driving me nuts and he saved me. I am going to use the same shop he has been working with. I am really excited for a great shop to do the work on my Chrome.
"All Baseships are now in range to attack the Colonies."
-
GoldCylon
- Founder
- Posts: 6945
- Joined: Fri Dec 02, 2005 3:02 pm
- Location: Sacramento
- Contact:
Re: Building my Cylon-Knight
Better get that back pack done if you want it chromed.
Who is online
Users browsing this forum: No registered users and 13 guests